- (781) 521 - 6395
- info@jclconstructioninc.com
- jclconstruction.hours@gmail.com
- Mon - Fri: 7:00 - 17:00Saturdays by appointment
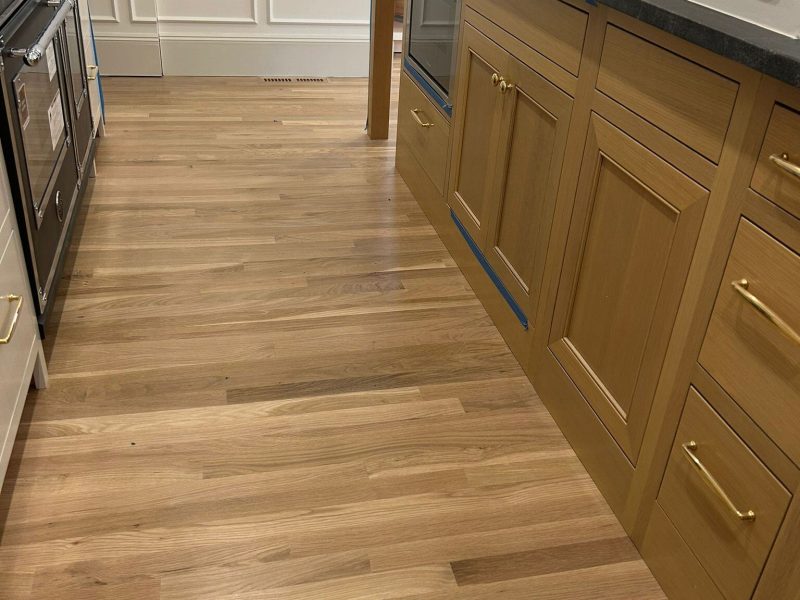
Hardwood floors are one of the best features an older Cambridge or Boston home can have. Many of them have been under foot for 50, 80, or even 100 years. Unlike most flooring materials, solid hardwood does not have to be replaced when it looks tired. In most cases it can be sanded down to fresh wood and refinished, giving you a floor that looks new and keeps the character of the original.
The hard part is knowing when a floor needs refinishing, and what the process involves before you invite a crew and a lot of dust into your home. At JCL Construction, Inc., we restore and refinish hardwood floors throughout Cambridge, Boston, and Greater Boston. This guide explains what to look for and what to expect.
Look at the path from your front door to the kitchen, the area in front of the sink, and the hallways. If the finish has worn away and you can see bare, dull wood, the floor has lost its protective layer. Bare wood absorbs moisture and dirt, so damage speeds up once the finish is gone.
A few light surface scratches are normal and can often be fixed with a screen and recoat. Scratches that go through the finish and into the wood, or that cover large areas, usually mean the floor needs a full sanding.
If cleaning does not bring back the shine, the finish has likely worn down or become embedded with fine scratches that scatter light. Dullness is often the first visible sign that the protective coat is wearing out.
Water, pet accidents, and plant pots can leave dark spots and gray patches. If the discoloration is only in the finish or the top layer of wood, sanding can remove it. Stains that have soaked deep into the wood may remain visible, and in some cases the boards need to be replaced.
Place a few drops of water on the floor in a high-traffic area. If the water beads up, the finish is still protecting the wood. If it soaks in or darkens the wood within a minute or two, the finish is no longer doing its job.
Sunlight lightens wood over time, particularly near windows and doors. Area rugs can leave visible outlines where the wood underneath was protected. Refinishing evens out these differences.
Sometimes the floor is structurally sound and you just want a change. Many older Boston-area homes have floors in dated orange-tone finishes. Refinishing lets you go with a natural tone, a darker stain, or a modern low-sheen look without installing new flooring.
Not every worn floor needs the same treatment. Here are the three common paths:
Screen and recoat (buff and coat)
The existing finish is lightly abraded and a fresh coat of finish is applied. This works when the floor has dull spots and light surface scratches but the finish has not worn through to bare wood. It is faster and less expensive than a full refinish, and there is much less dust.
Full refinishing (sand to bare wood)
The old finish is sanded off completely, the floor is stained if desired, and new finish coats are applied. This is the right choice when the finish is worn through, scratches are deep, stains are present, or you want to change the color.
Replacement or repair of boards
If boards are severely warped, rotted, or damaged by long-term water exposure, individual boards or whole sections may need to be replaced. A good contractor can often blend new boards into an existing floor so the repair is not obvious after refinishing.
Solid hardwood can usually be refinished several times over its life, because the wear layer is thick. Floors in pre-war Cambridge and Boston homes have often been refinished before, so a professional should check how much wood remains above the nails and tongue-and-groove joints.
Engineered hardwood can only be refinished if the top veneer layer is thick enough to sand. Some can be refinished once or twice. Others have a very thin wear layer and cannot be sanded safely. Your contractor can check the thickness at a floor vent or a board edge.
Laminate and luxury vinyl plank cannot be refinished. They have to be replaced when worn.
A professional assessment comes first. The contractor checks the species and condition of the wood, looks for loose or squeaking boards, protruding nails, moisture issues, and previous repairs, and confirms the floor has enough thickness to sand. This is also when you choose stain color and finish type.
Furniture, rugs, and wall hangings need to be removed from the rooms. Doorways and vents are covered or sealed to limit dust, and baseboards may be protected or temporarily removed. Professional crews use sanders with dust-containment systems, but a refinish still produces some fine dust, so cover or remove belongings in nearby rooms.
Loose boards are secured, protruding nails are set below the surface, and gaps or damaged areas are filled or repaired. Fixing these issues first gives a smoother, longer-lasting result.
Sanding is the heart of the job and the step that most separates professional work from amateur results. It is done in stages with progressively finer sandpaper:
Large drum or belt sanders handle the open floor, edge sanders reach along walls, and hand scraping or detail sanding covers corners and stairs. Skipping a grit, or pressing too hard in one spot, leaves visible marks that show up once the stain and finish go on.
After sanding, the floor is vacuumed and wiped thoroughly. Any remaining dust gets trapped under the finish and shows as bumps or specks in the final surface.
Stain changes the color of the wood. Many homeowners prefer a natural look and skip it, which lets the wood’s own tone show through. Test stain colors on a sample of your actual floor before committing. The same stain looks different on oak, maple, and pine, and on boards of different ages.
Typically two to three coats of finish are applied, with light abrading between coats for good adhesion. The main options are:
Sheen matters too. Matte and satin finishes have become popular because they hide scratches and dust better than high-gloss finishes.
Drying and curing are different. A floor may be dry enough to walk on in socks after a day or so, but the finish takes much longer to fully harden. Timing depends on the product, humidity, and temperature. Your contractor will give you specific guidance. In general, avoid heavy furniture and rugs until the finish has cured fully, since early placement can leave marks or cause the finish to stick.
For an average-sized room or a few connected rooms, expect the active work to take several days. Larger projects, stair refinishing, extensive repairs, and multiple coats of finish add time. Humid weather slows drying, which is worth keeping in mind in a New England summer. Your contractor should give you a written schedule that includes drying time between coats and the recommended wait before moving furniture back.
For more on how project timelines work, see our guide on how long a kitchen or bathroom renovation takes in Cambridge, MA.
A fresh finish lasts longer with a little care:
If you keep up with simple maintenance, a screen and recoat every few years can often refresh the finish before the floor needs another full sanding.
Floors that have been walked on for decades don’t have to be torn out. A careful refinish can bring them back to a condition that looks and feels new, while keeping the character that makes older Cambridge and Boston homes special. At JCL Construction, Inc., we inspect each floor first, recommend the right level of work, and handle every step from repairs through final finish.
If you’re deciding between refinishing and a new floor, our guide to the best flooring options for Massachusetts homes can help.
Contact us today for a free estimate on your hardwood floor refinishing project.
📞 (781) 521-6395
📧 info@jclconstructioninc.com

From remodeling and new construction to painting and flooring, we deliver quality workmanship you can trust. Contact our team today for a free estimate and professional guidance for your next project.
Trust JCL Construction, Inc. to make your construction projects a reality. Contact us today and let us be your trusted partner on the road to transforming your space!